Are you looking for the best automation rules to help ecommerce businesses prevent shipping problems? Here are the 10 most frequently used shipping automation rules for Descartes XPS Ship™ software. Save time and money by using technology to eliminate tedious, repetitive manual tasks and maximize shipping efficiency.
1. Set Terms of Trade
- Shipping Problem: Wasting time by having to look up necessary trade-based terms on each product for international shipments.
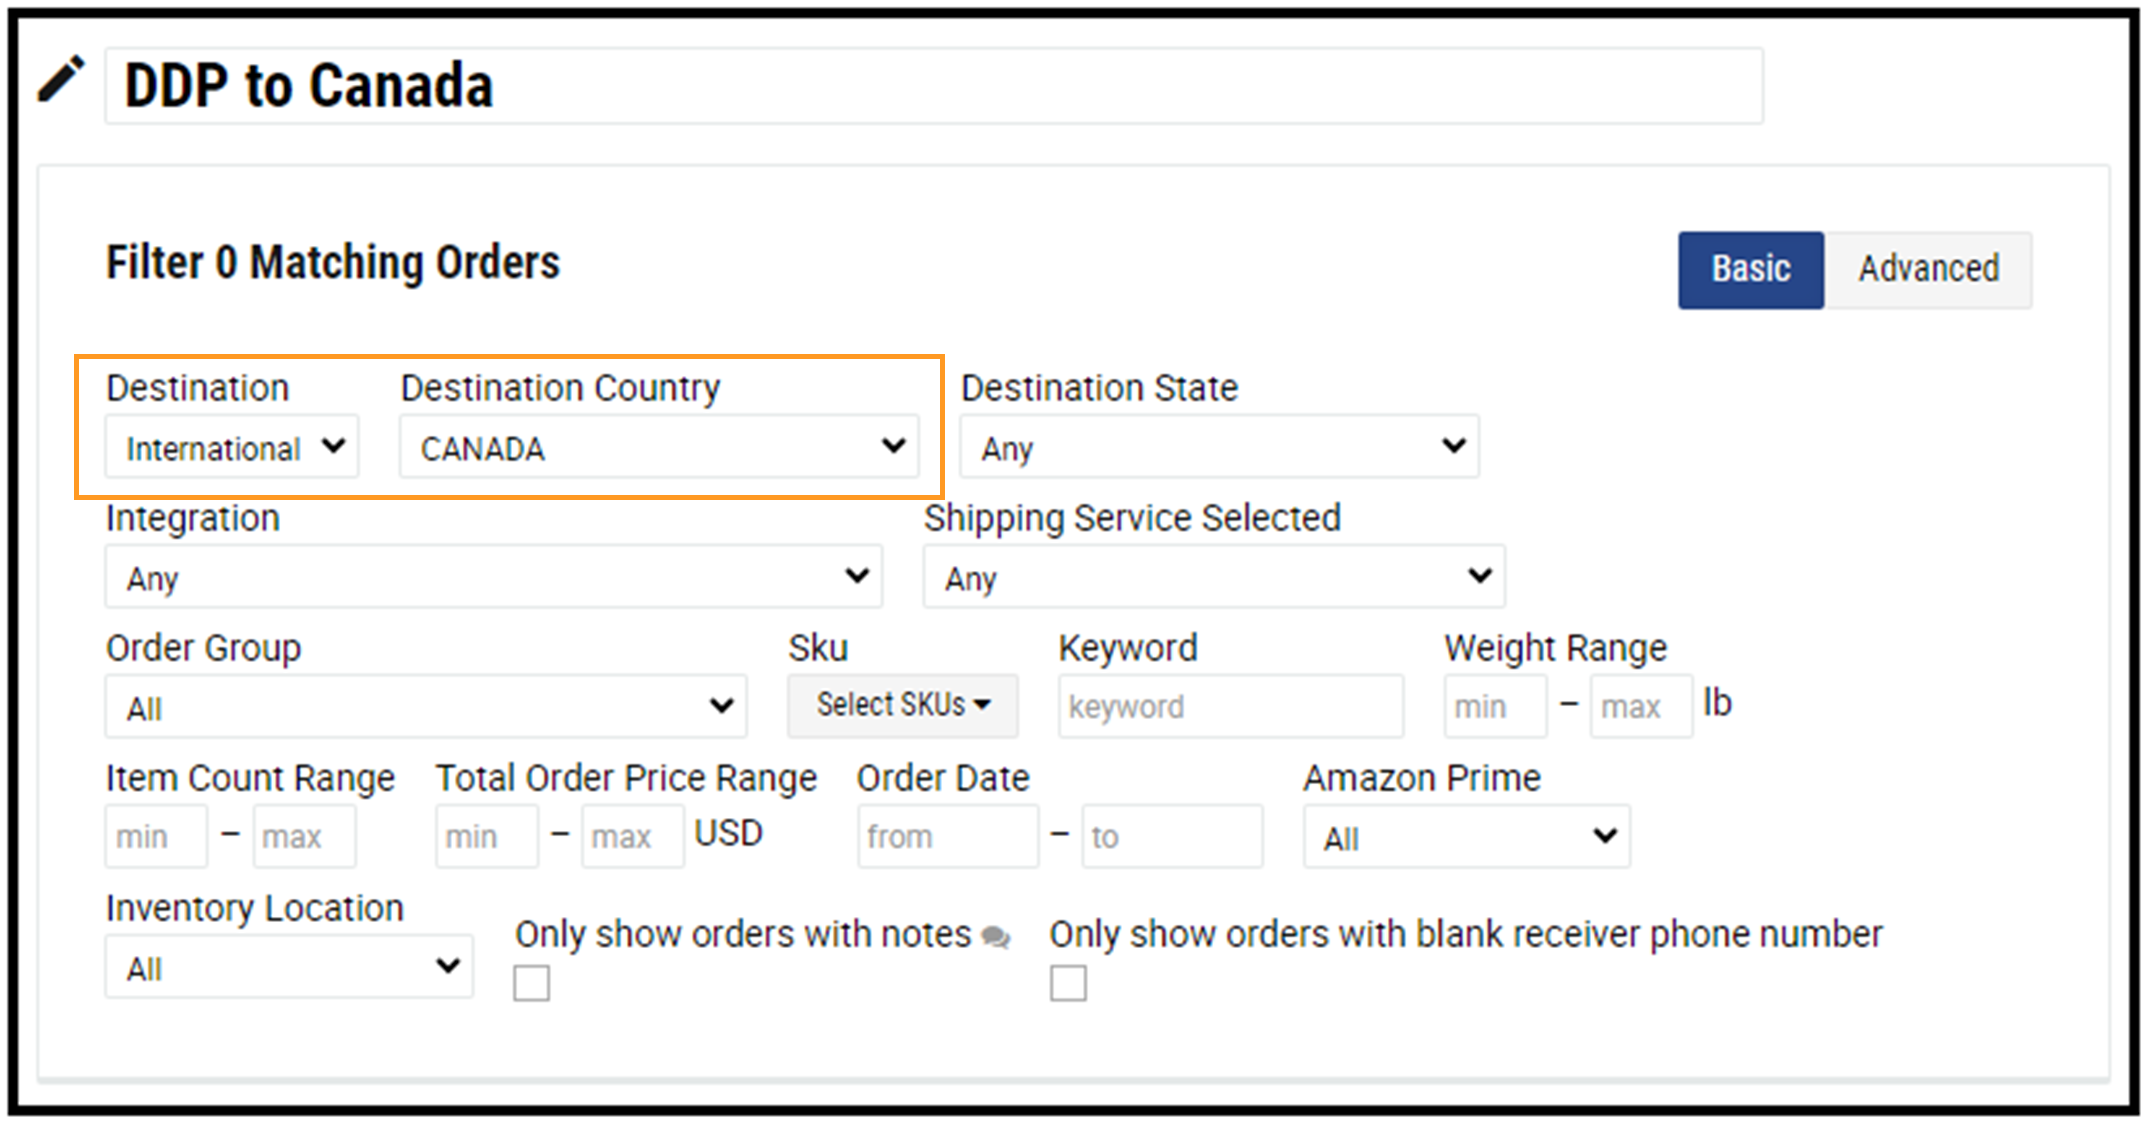
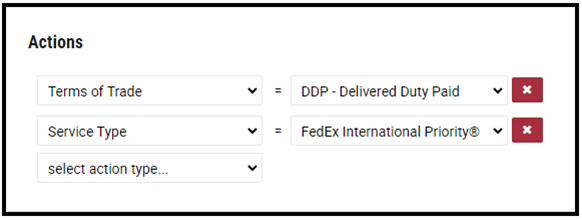
- Shipping Automation: Set the desired “Destination,” “Destination Country,” and “Destination State” (if applicable) for your order. Then, select the correct “Terms of Trade,” and the same “Terms of Trade” will automatically apply to every order shipped to that “Destination.”
In this example, IF a shipment is going to Canada, THEN the “Terms of Trade” is “DDP – Delivery Duty Paid” and the “Service Type” is set to “FedEx International Priority.”
2. Select Service
- Shipping Problem: Having to filter through batches of orders to verify that the service matches the one their customer chose at checkout.
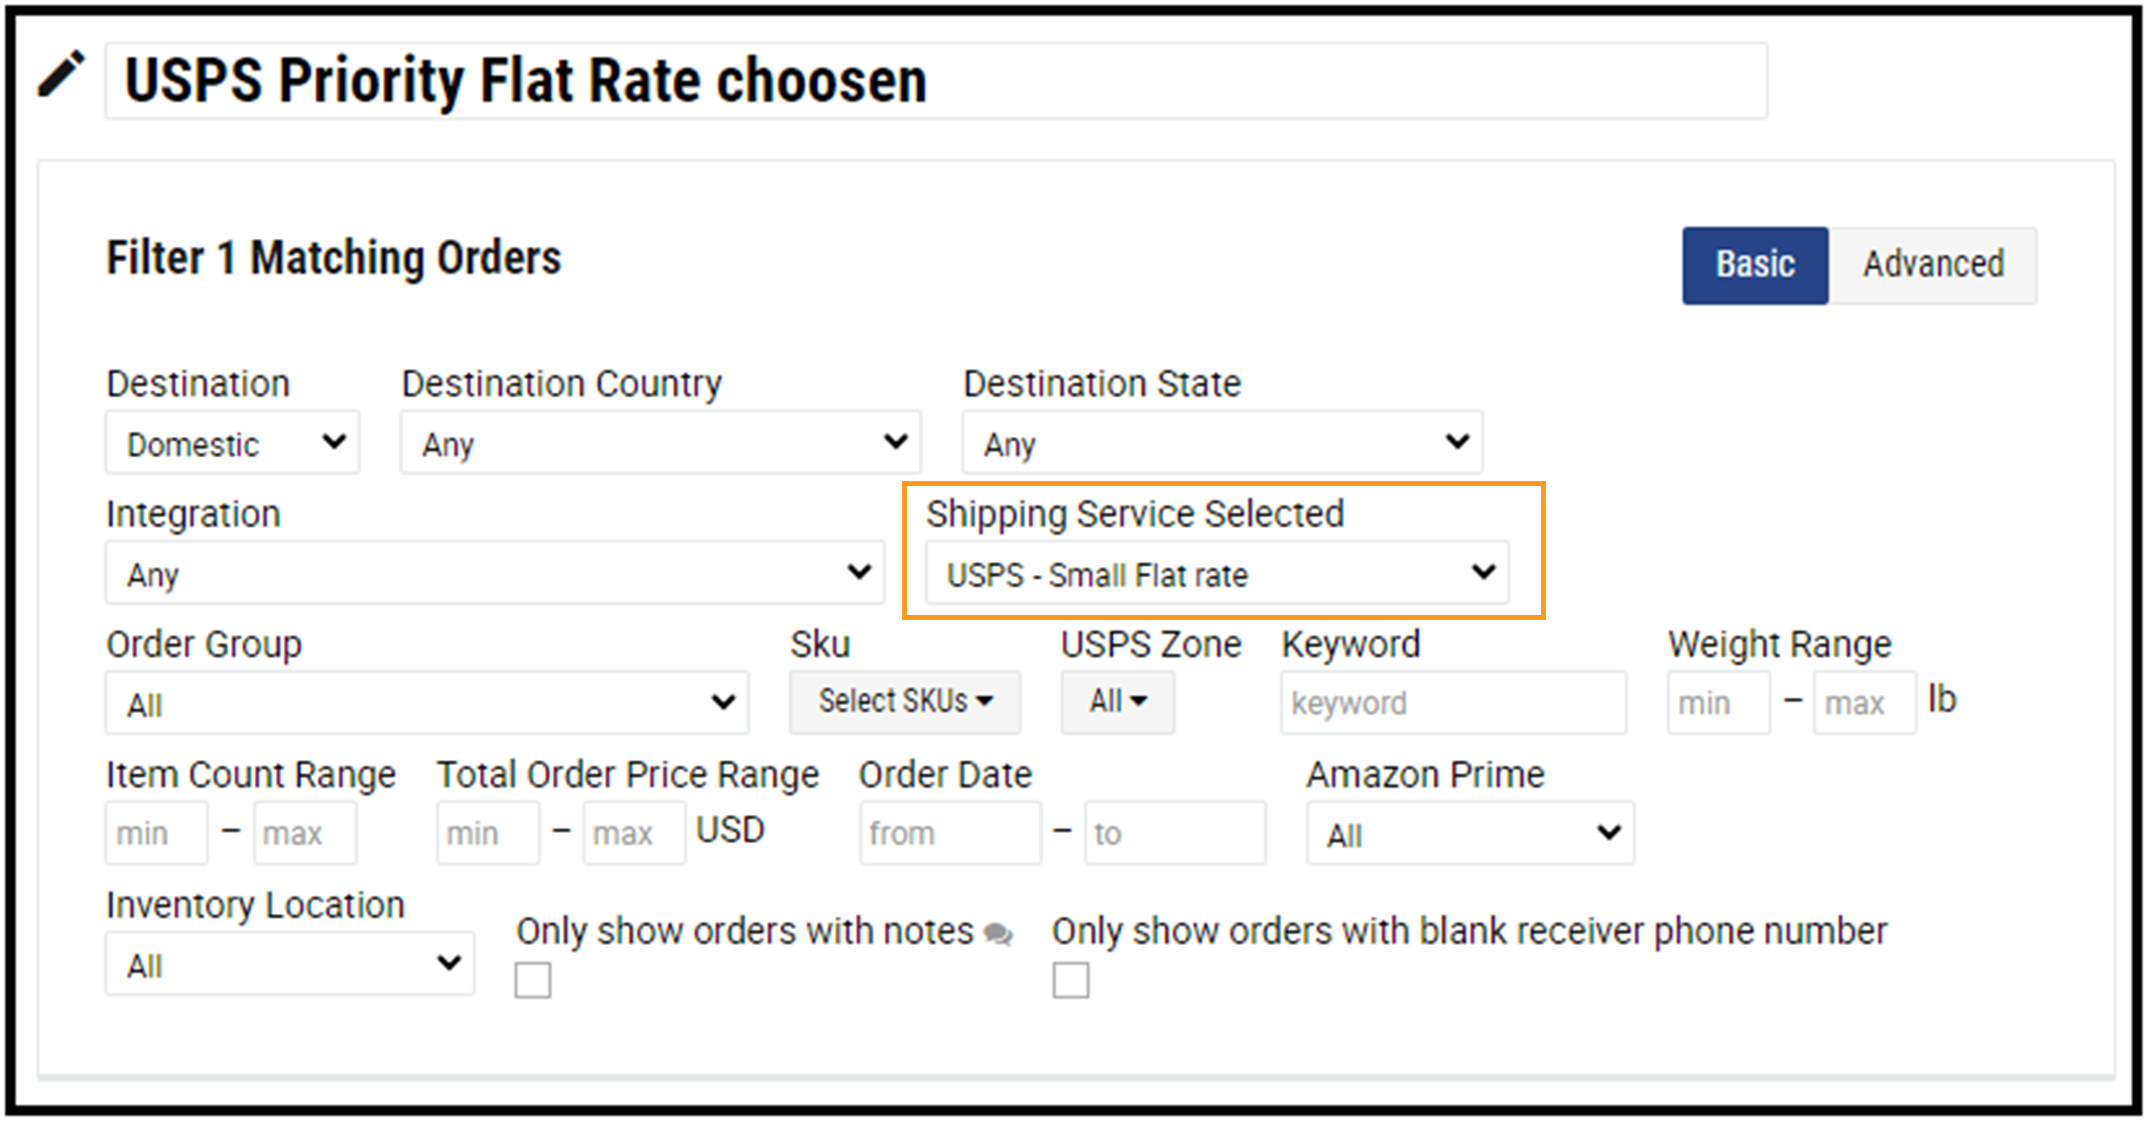
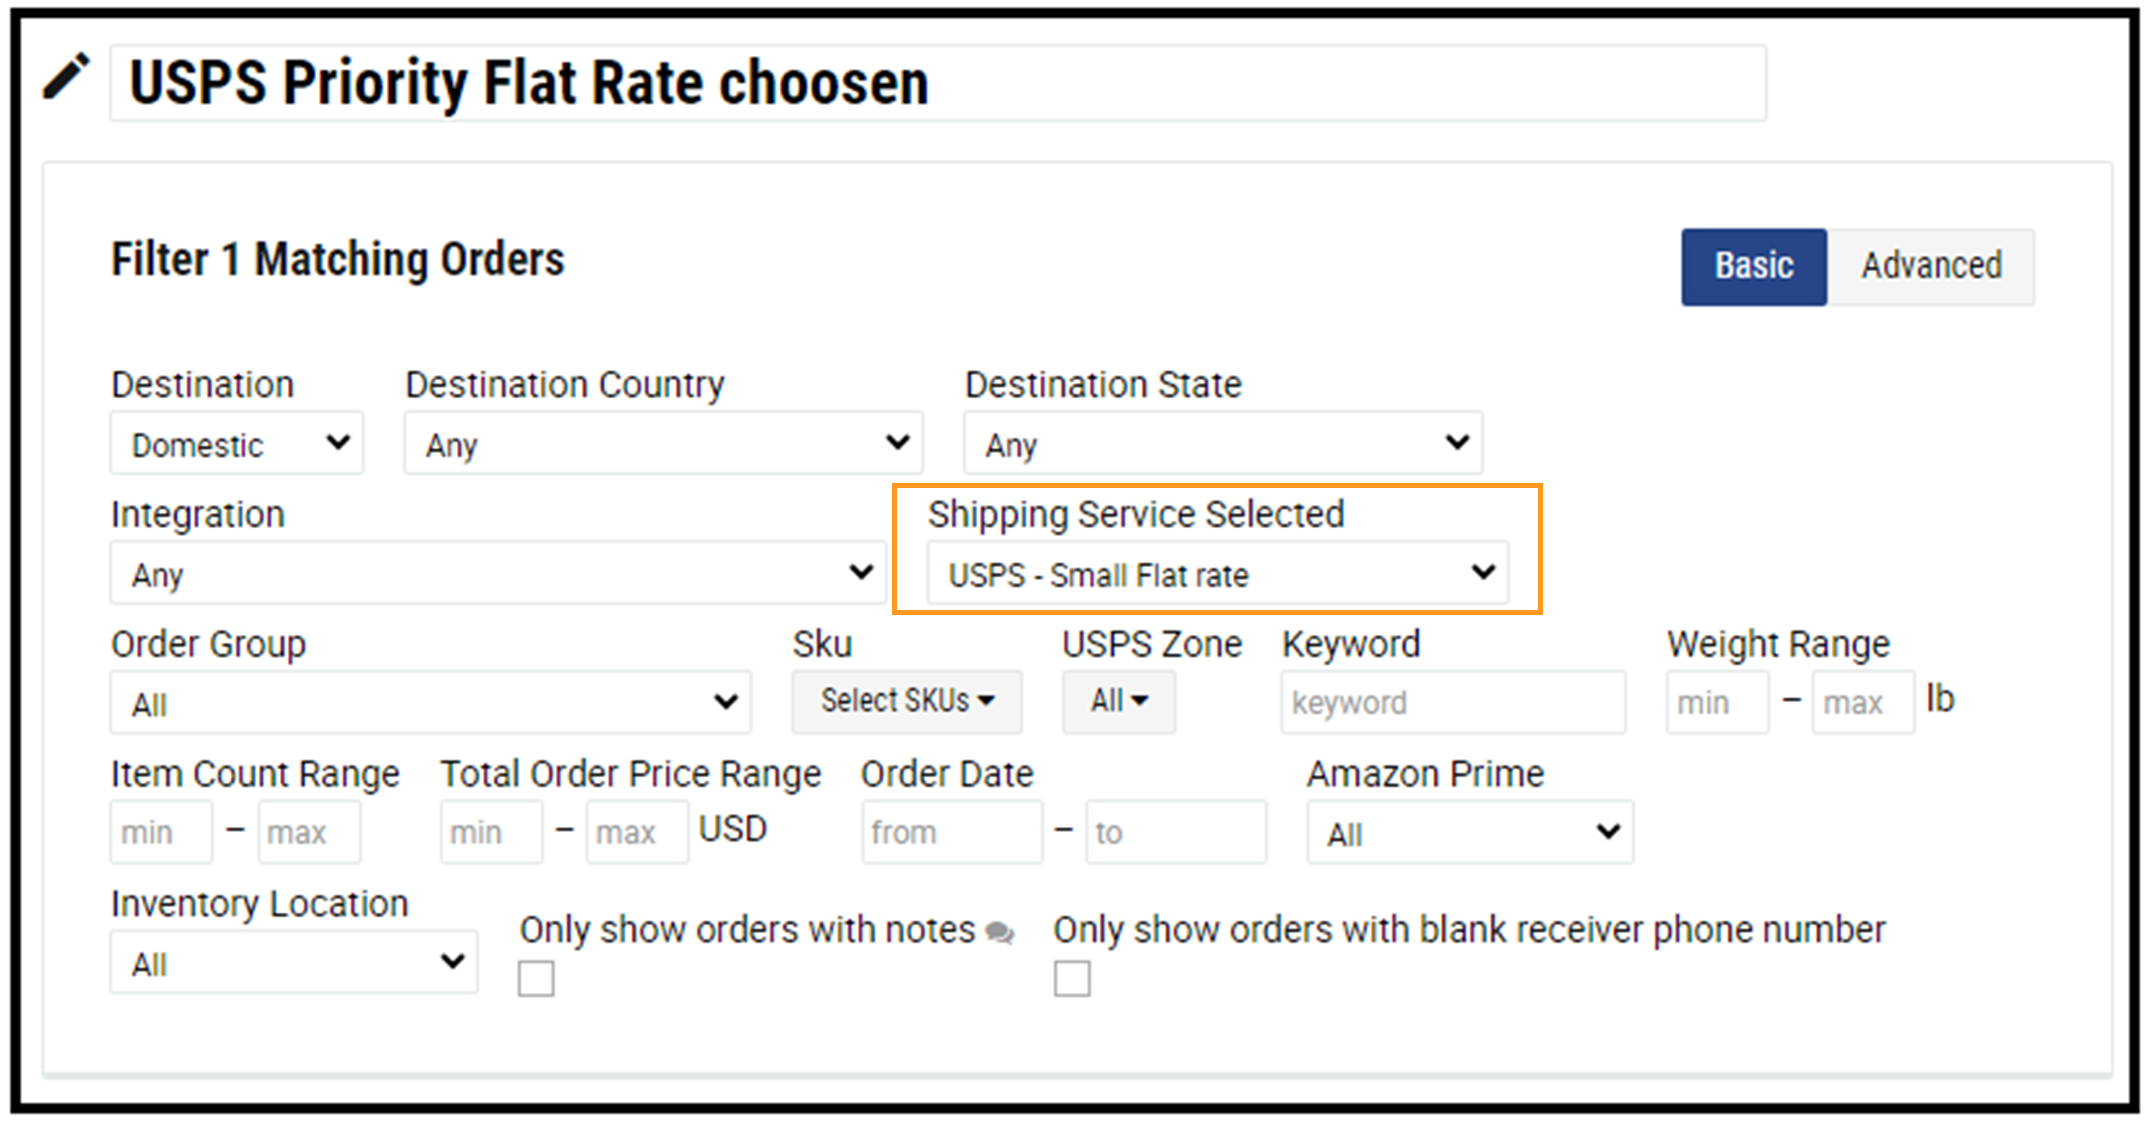
- Shipping Automation: Select the desired “Shipping Service Selected” and the correct “Service Type” for that shipping service will default to the same service type for every order that uses the designated “Shipping Service Selected.”
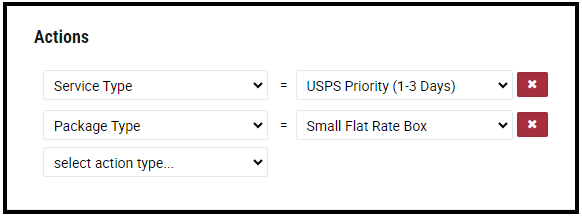
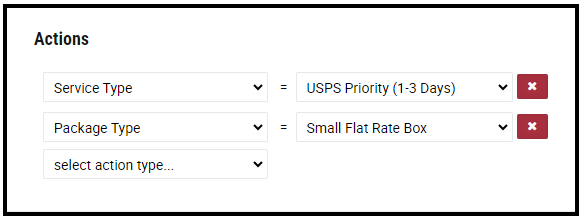
In this example, IF a customer chooses “USPS – Small Flat Rate” at checkout, THEN the USPS Priority service will be applied.
3. Select Package Type
- Shipping Problem: Wasting time selecting or entering package dimensions for every order.
- Shipping Automation: Set the desired “Shipping Service Selected” and the applicable “Package Type” for orders using that service, and the system will automatically apply the right “Package Type” to every order using that shipping service.
In this example, IF a customer chooses “USPS – Small Flat Rate” at checkout, THEN the “USPS – Small Flat Rate” box “Package Type” would be applied.
4. Signature Option Based on Value or Location
- Shipping Problem: Remembering and taking time to select signature options based on the value of shipment or the receiver’s location.
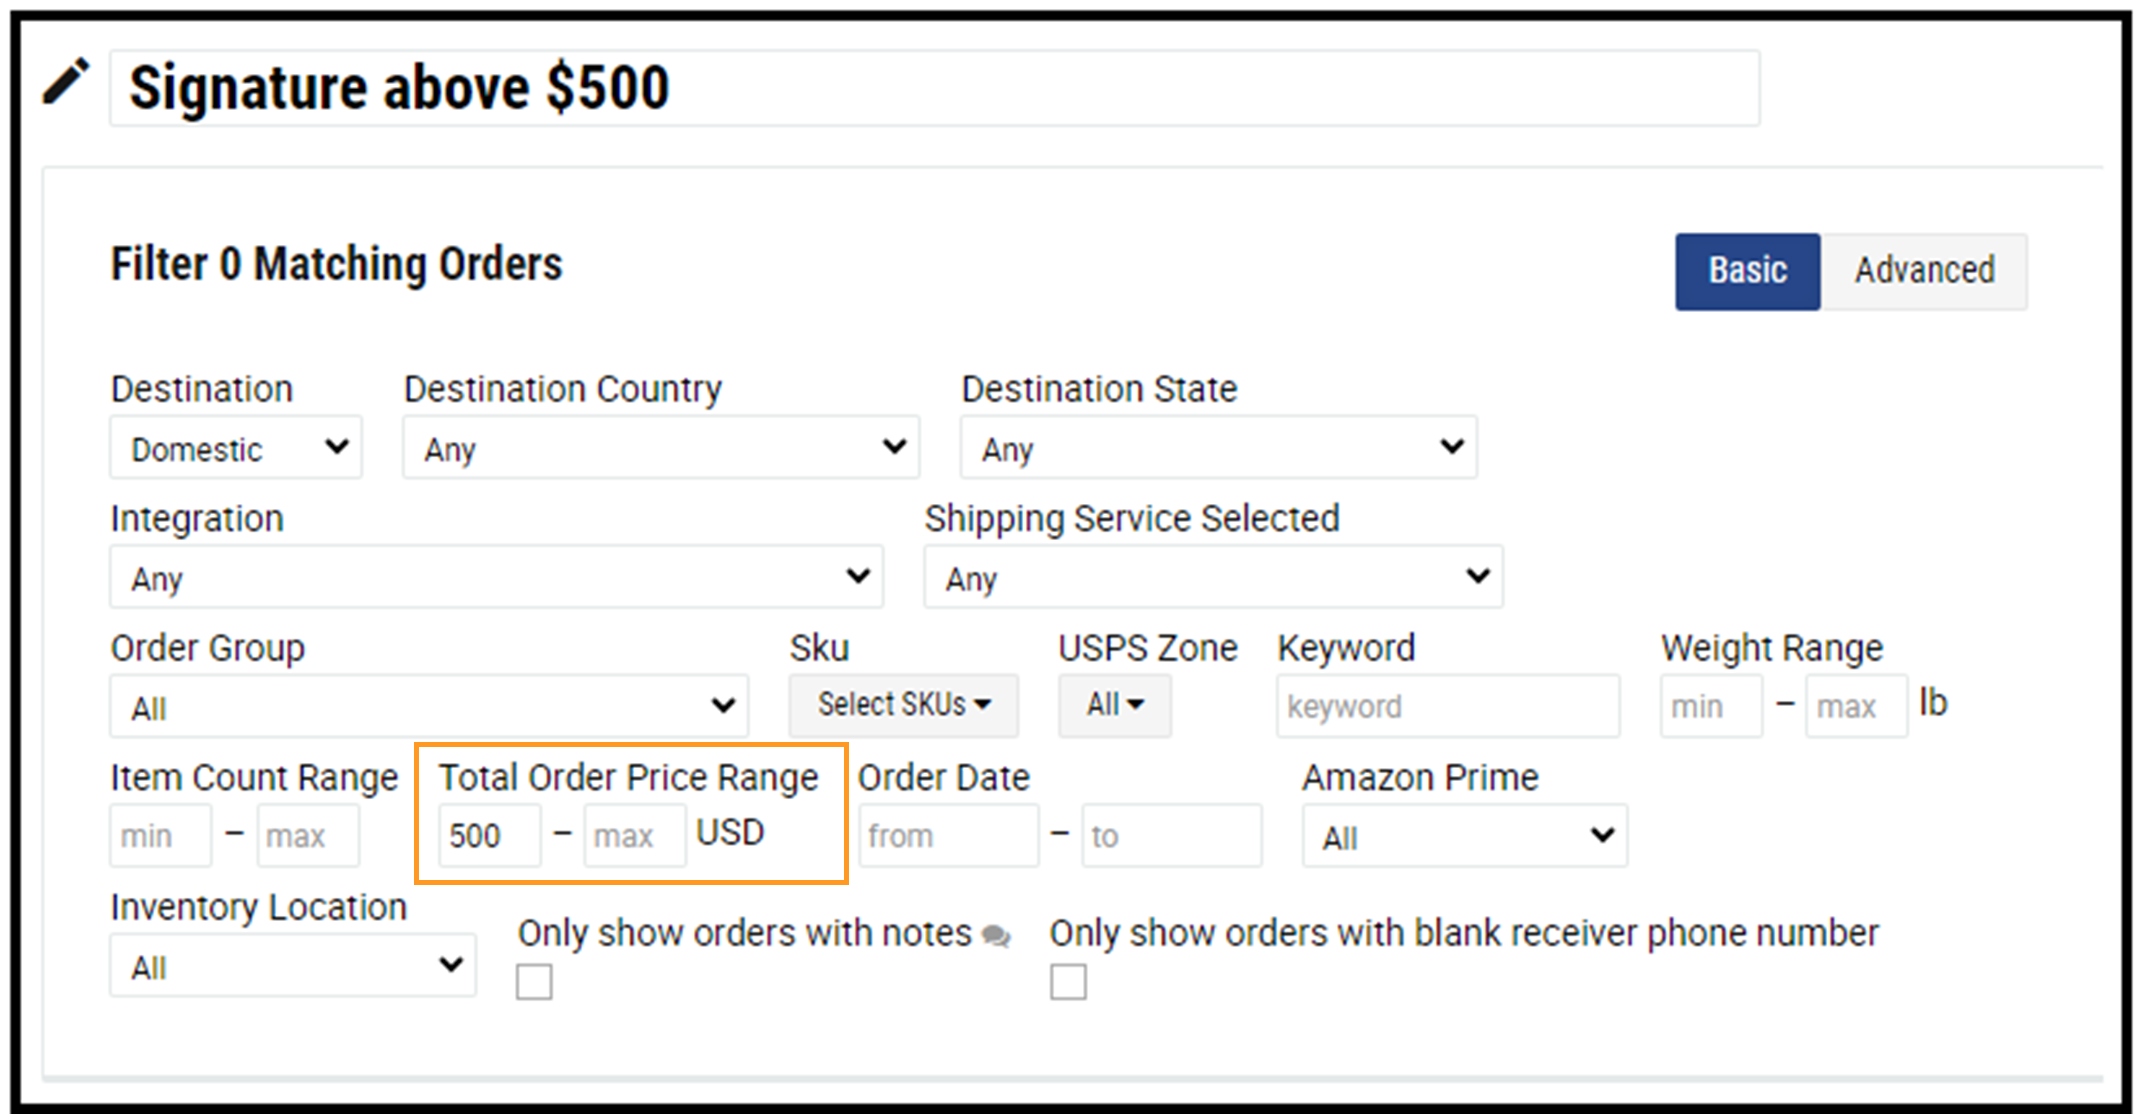
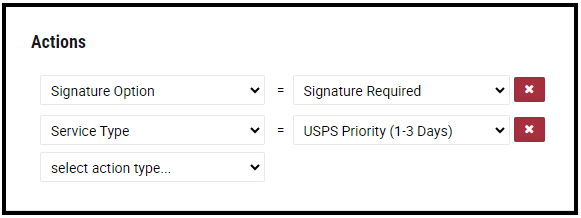
- Shipping Automation: Set the desired “Total Order Price Range” and “Signature Option,” and the correct “Signature Option” for every order that falls within the price range will automatically be applied.
In this example, IF the “Total Order Price Range” is over $500, THEN the “signature required” signature option will automatically be applied.
5. Enable Total Shipping Protection
- Shipping Problem: Wasting time manually applying shipping insurance for certain items; forgetting to apply shipping insurance.
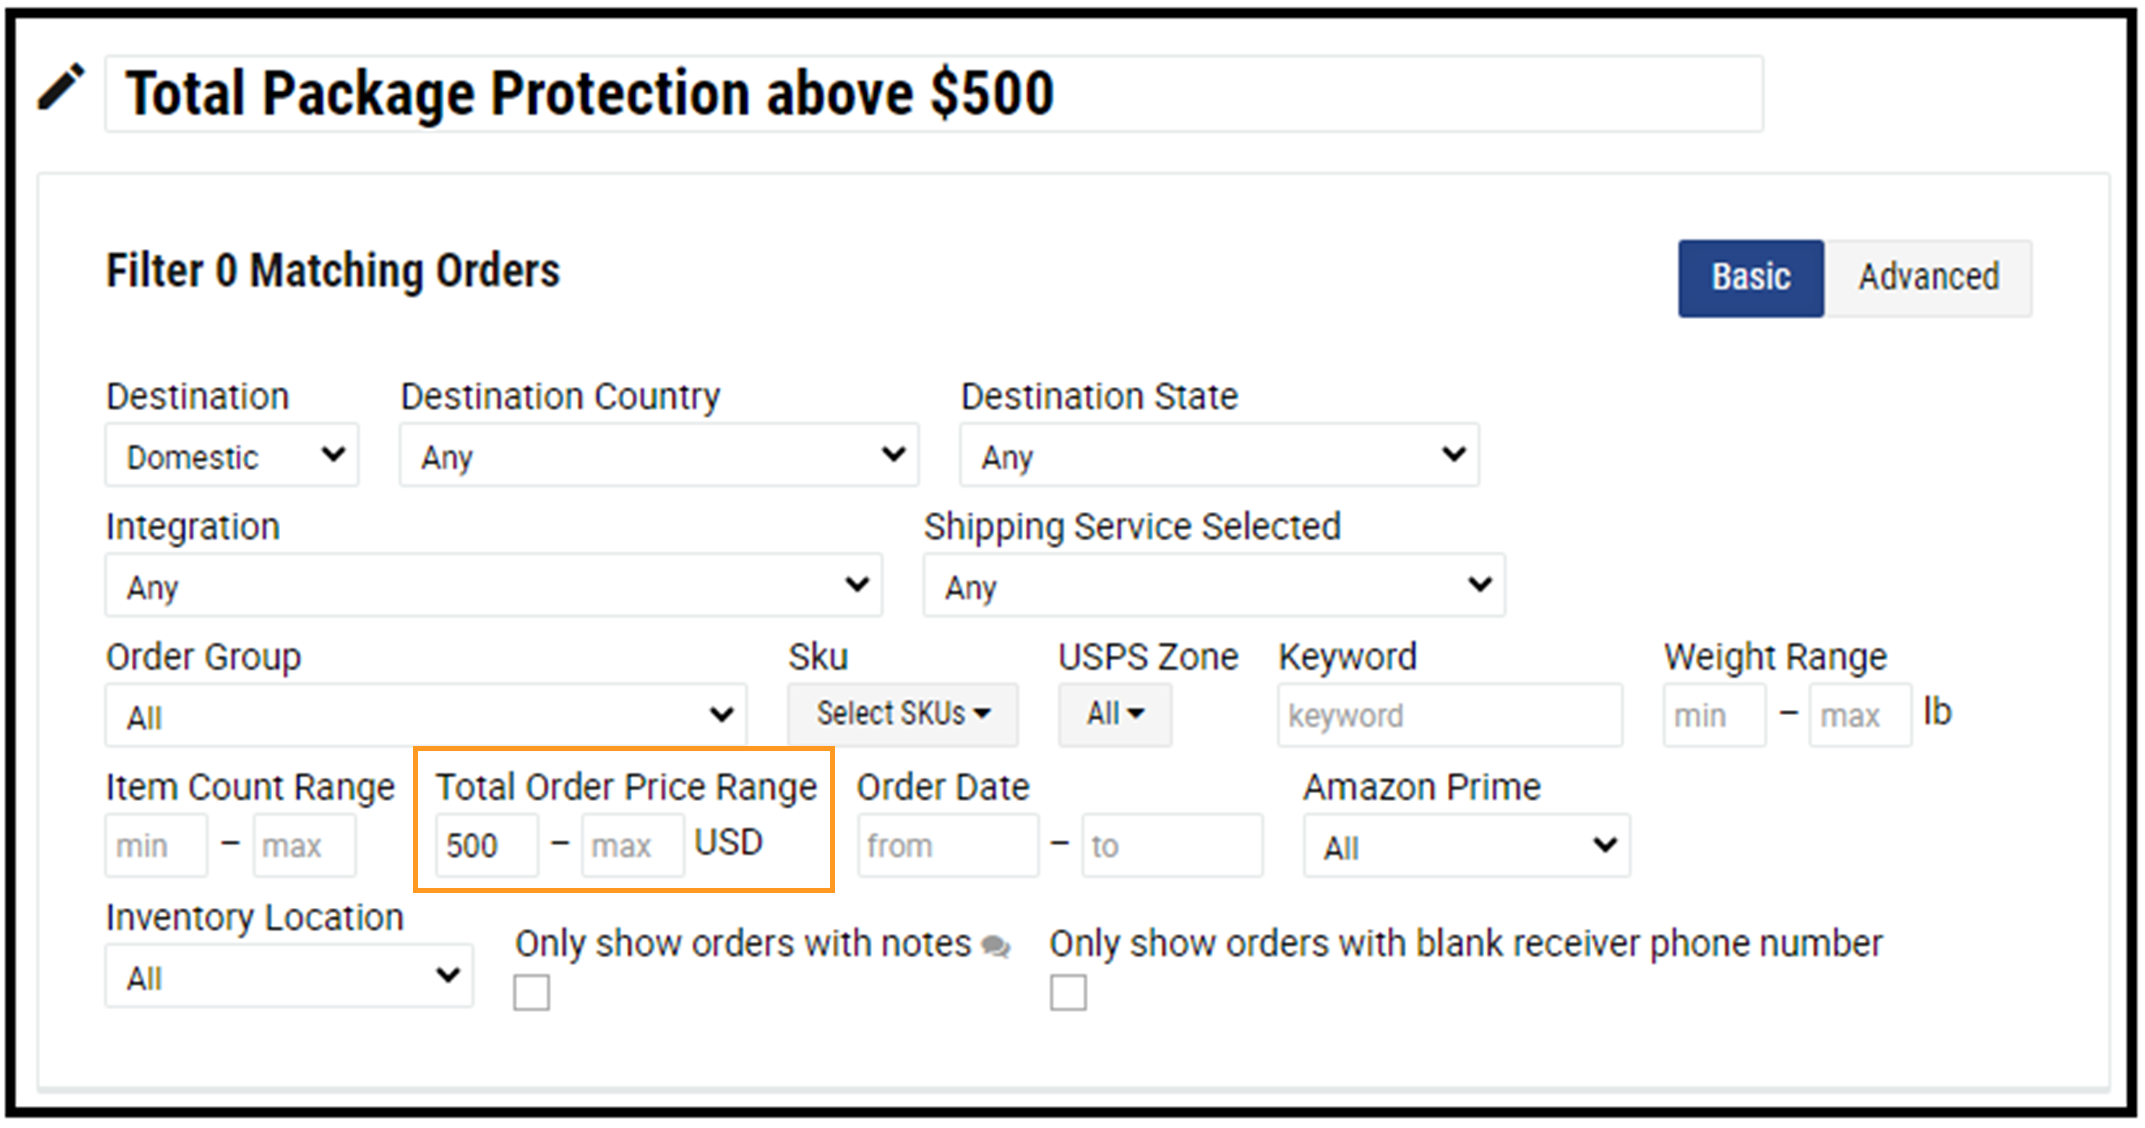
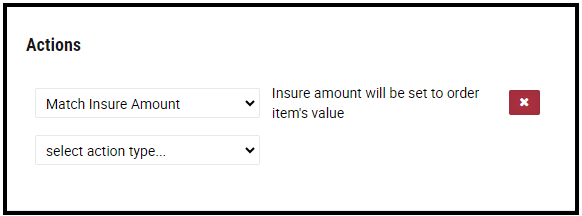
- Shipping Automation: Enter your desired “Total Order Price Range” and select the “Match Insure Amount” action. Then, Total Shipping Protection shipping insurance will be applied for every order that falls within the specified price range.
In this example, IF the total order value is above $500, THEN Total Shipping Protection will automatically be added and match the amount of the order item’s value.
6. Add Tag
- Shipping Problem: Spending too much time looking through my list of orders; I want to group orders with similar characteristics for faster processing.
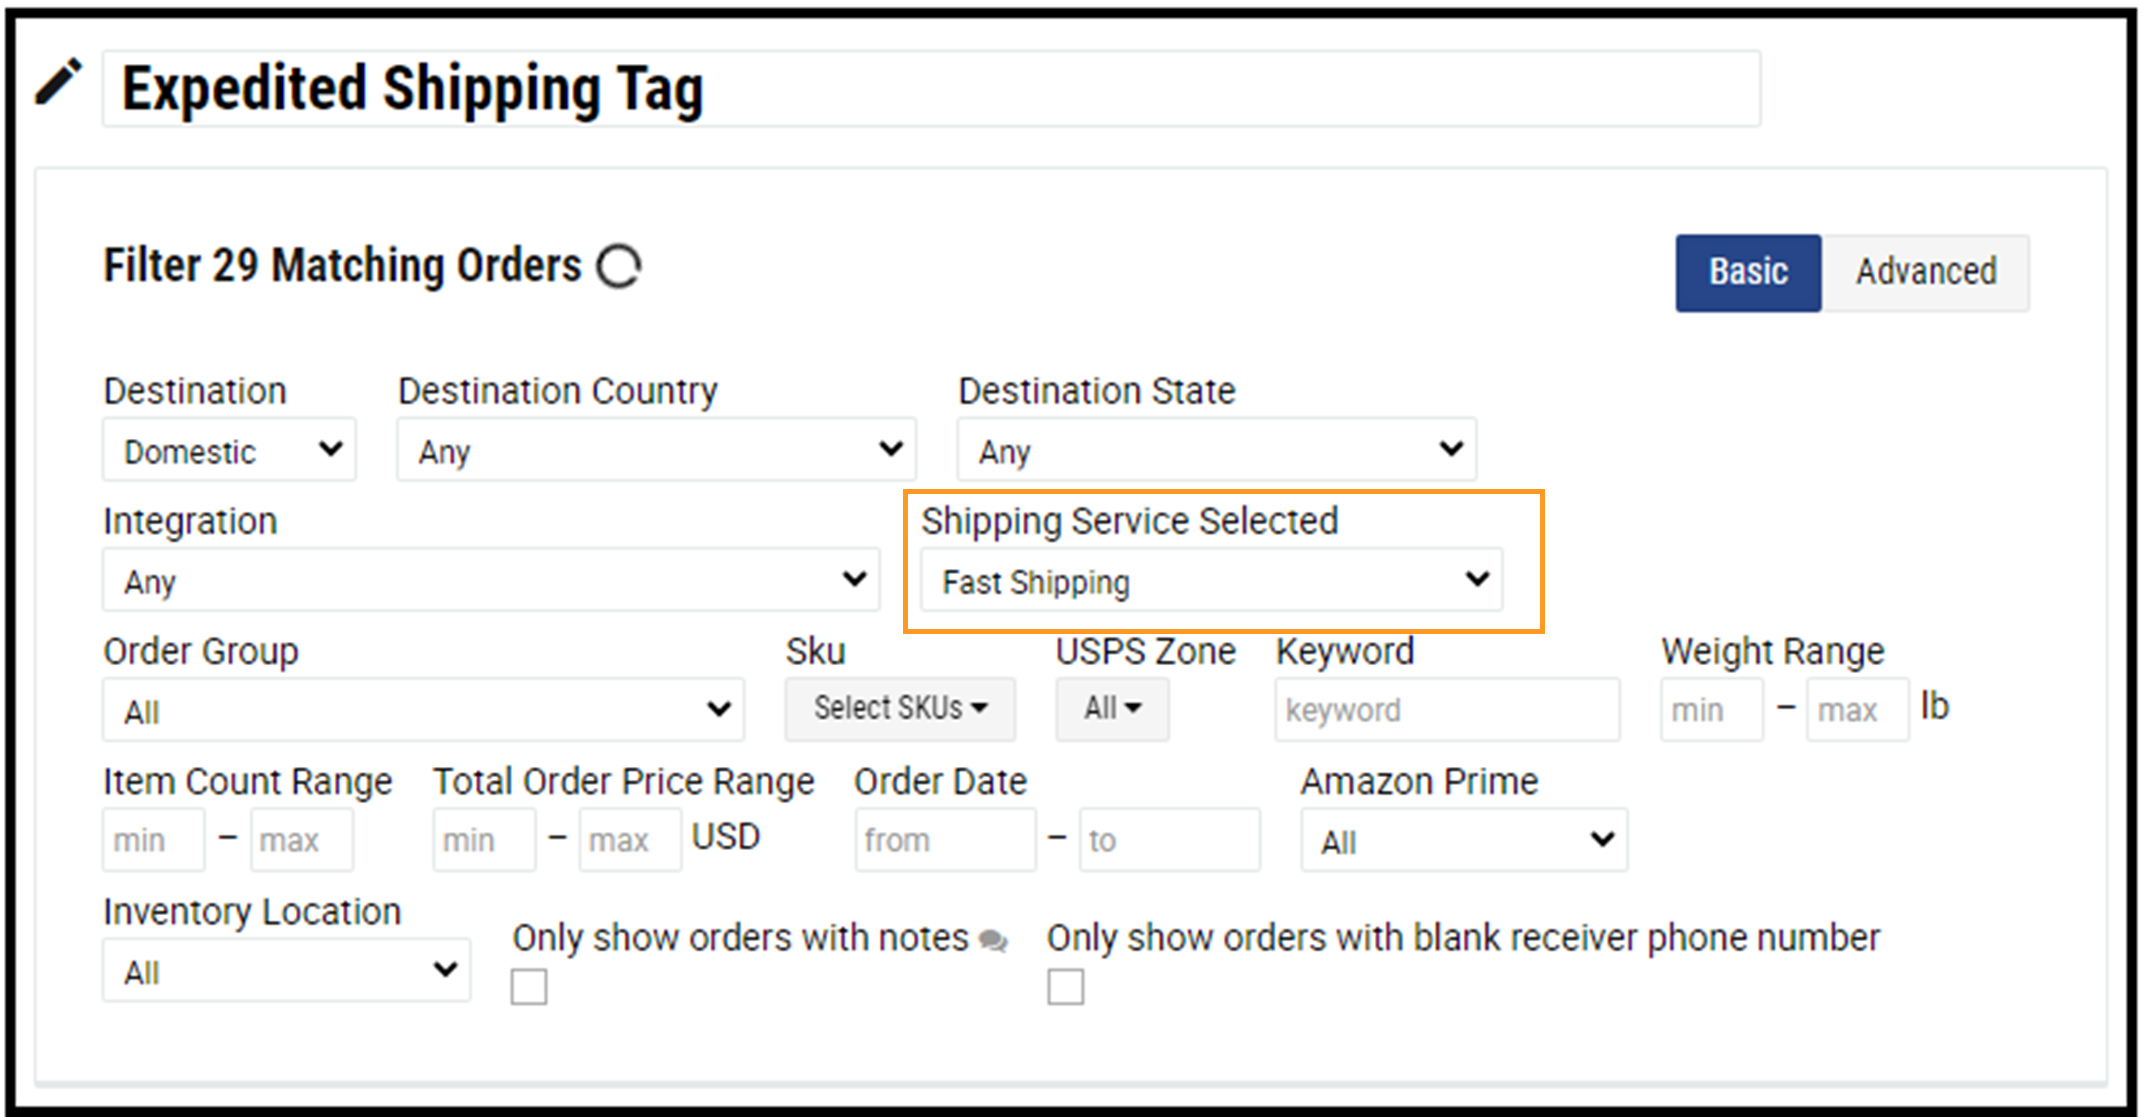
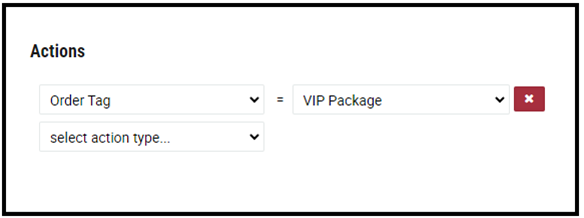
- Shipping Automation: To apply tags, set desired filter criteria for different buckets of order types (i.e., next-day delivery, high value, international). Then, set your action to “Order Tag” and input the desired tag name. Every time an order meets the filter criteria, a tag will be added which will allow you to separate orders by tag and process them in batches.
In this example, IF “Fast Shipping” is selected, THEN the shipping software automatically tags the order as “VIP Package.”
7. Include Return Label
- Shipping Problem: Having to create a second shipment for an included return label to ship out with the package.
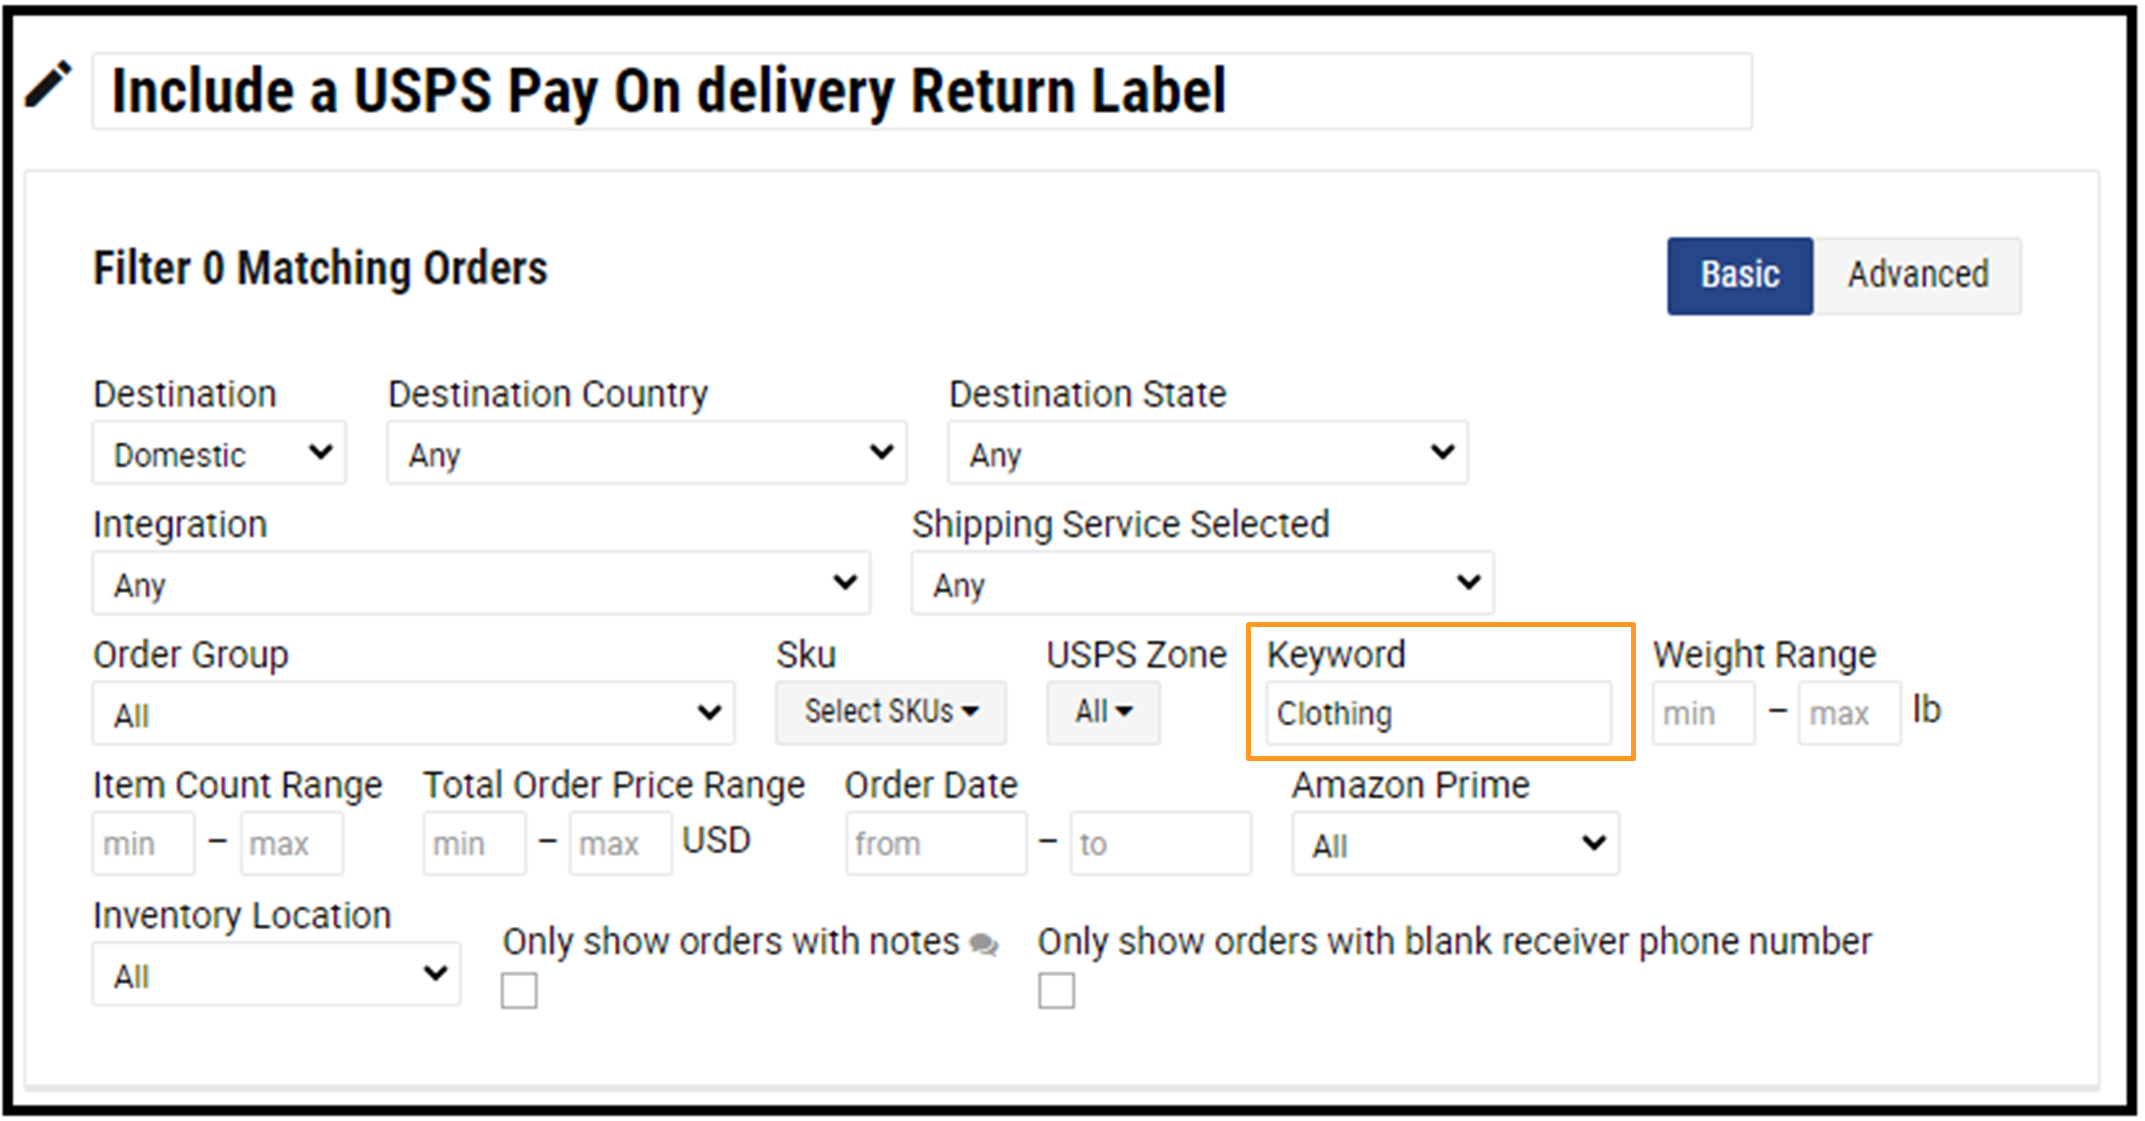
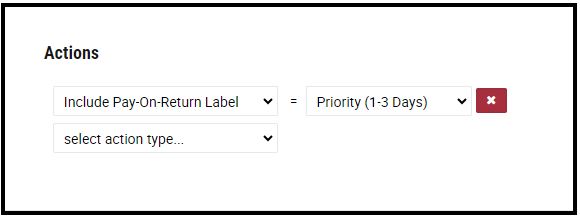
- Shipping Automation: Set your desired “Keyword.” Then, set your action to “Include Pay-On-Return Label” and select the desired service from the dropdown menu. The correct return label will automatically print for every order that contains the keyword.
In this example, IF the order contains the “Keyword” “Clothing,” THEN the shipping solution will automatically print a “Priority” “Pay-On-Return Label.”
8. Delete Order
- Shipping Problem: Time wasted scrolling or filtering to get rid of orders that don’t need to be shipped.
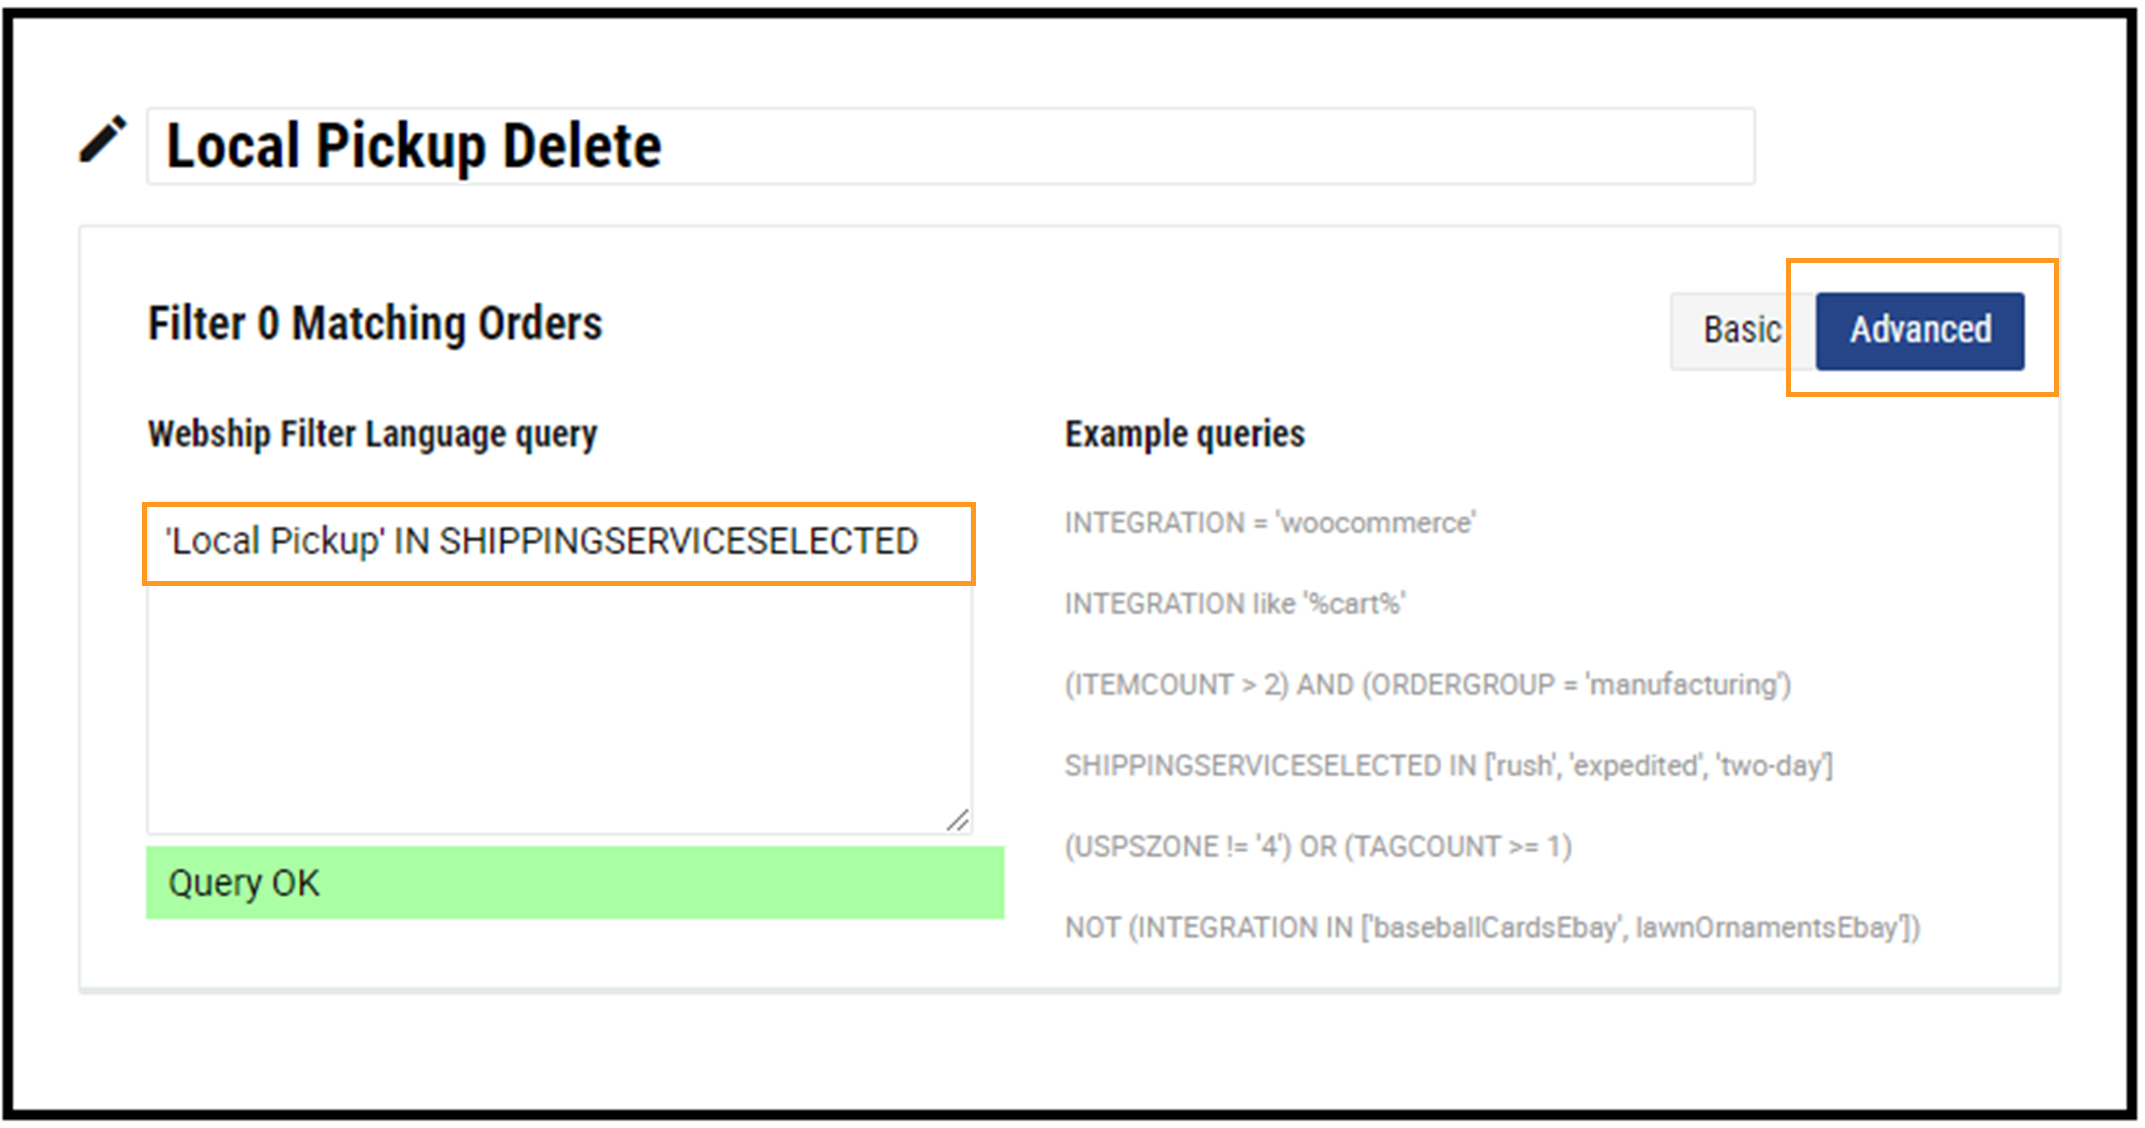
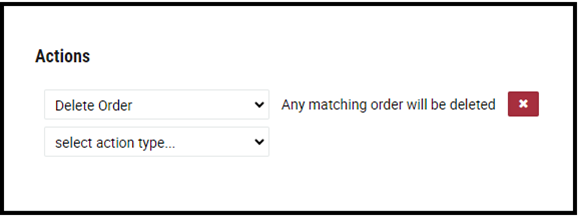
- Shipping Automation: Use the “Advanced” filter button to create a “Webship Filter Language query.” Enter the query criteria and set the action to “Delete Order”; then, the solution will automatically delete any order that contains the query criteria.
In this example, IF an order’s “Shipping Service Selected” is “Local Pickup,” THEN any matching order will automatically be deleted from the shipment order queue.
9. Set Return Address
- Shipping Problem: Having to ship with a different address or company name and manually update the return address that is printed on the label.
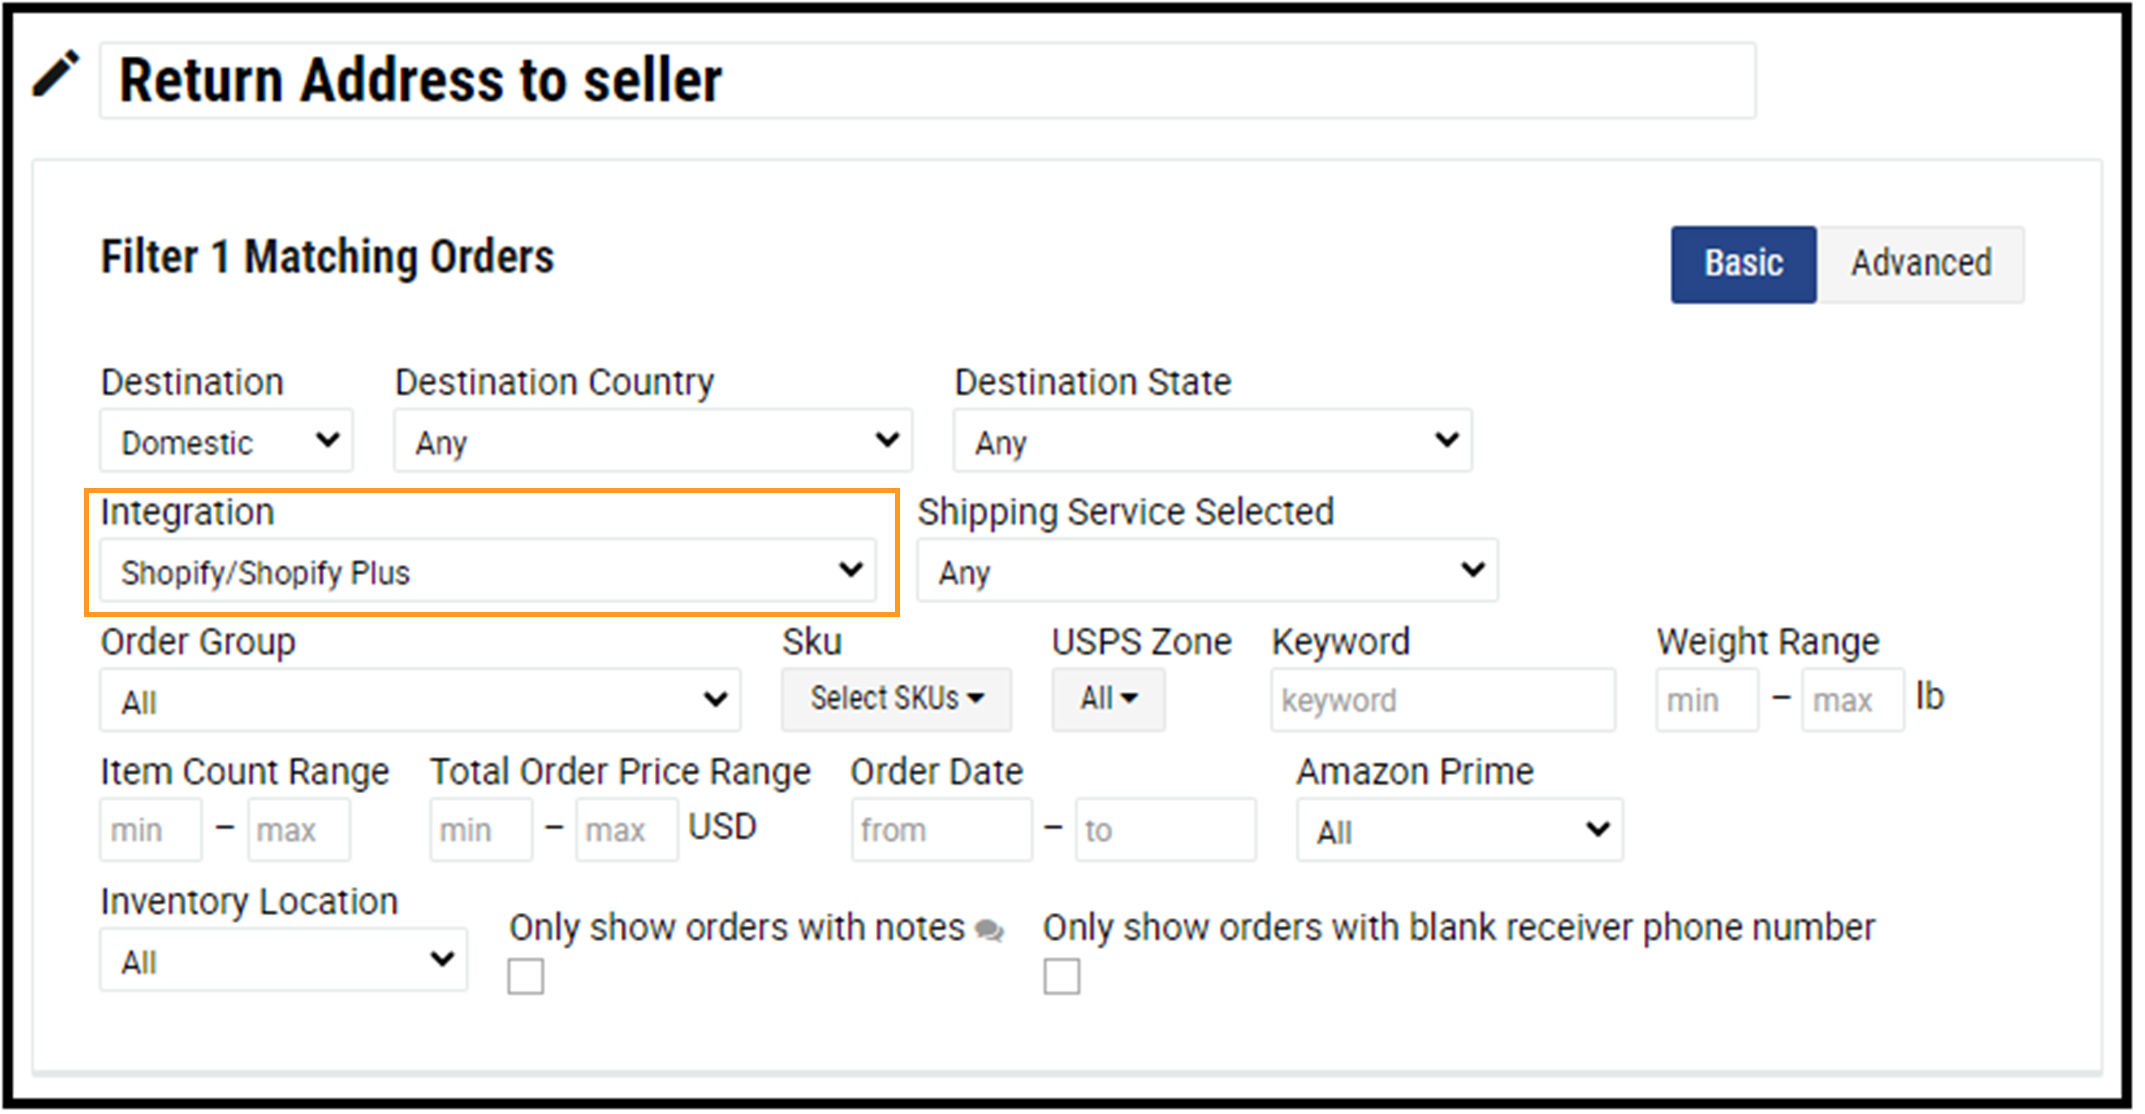
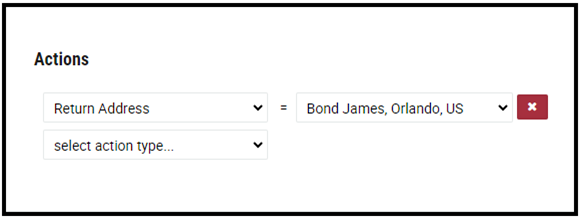
- Shipping Automation: Set your “Integration” to the desired option from the dropdown menu, then set the action to “Return Address.” Enter the desired return address, and every shipping label for orders from that “Integration” will automatically print with the correct “Return Address.”
In this example, IF the order comes from a “Shopify/Shopify Plus” Integration, THEN the shipping solution will override the default “Return Address” and use the “Bond James” address instead.
9. Split into Multiple Shipments
- Shipping Problem: Spending extra time manually entering additional box options when a shipment requires multiple boxes.
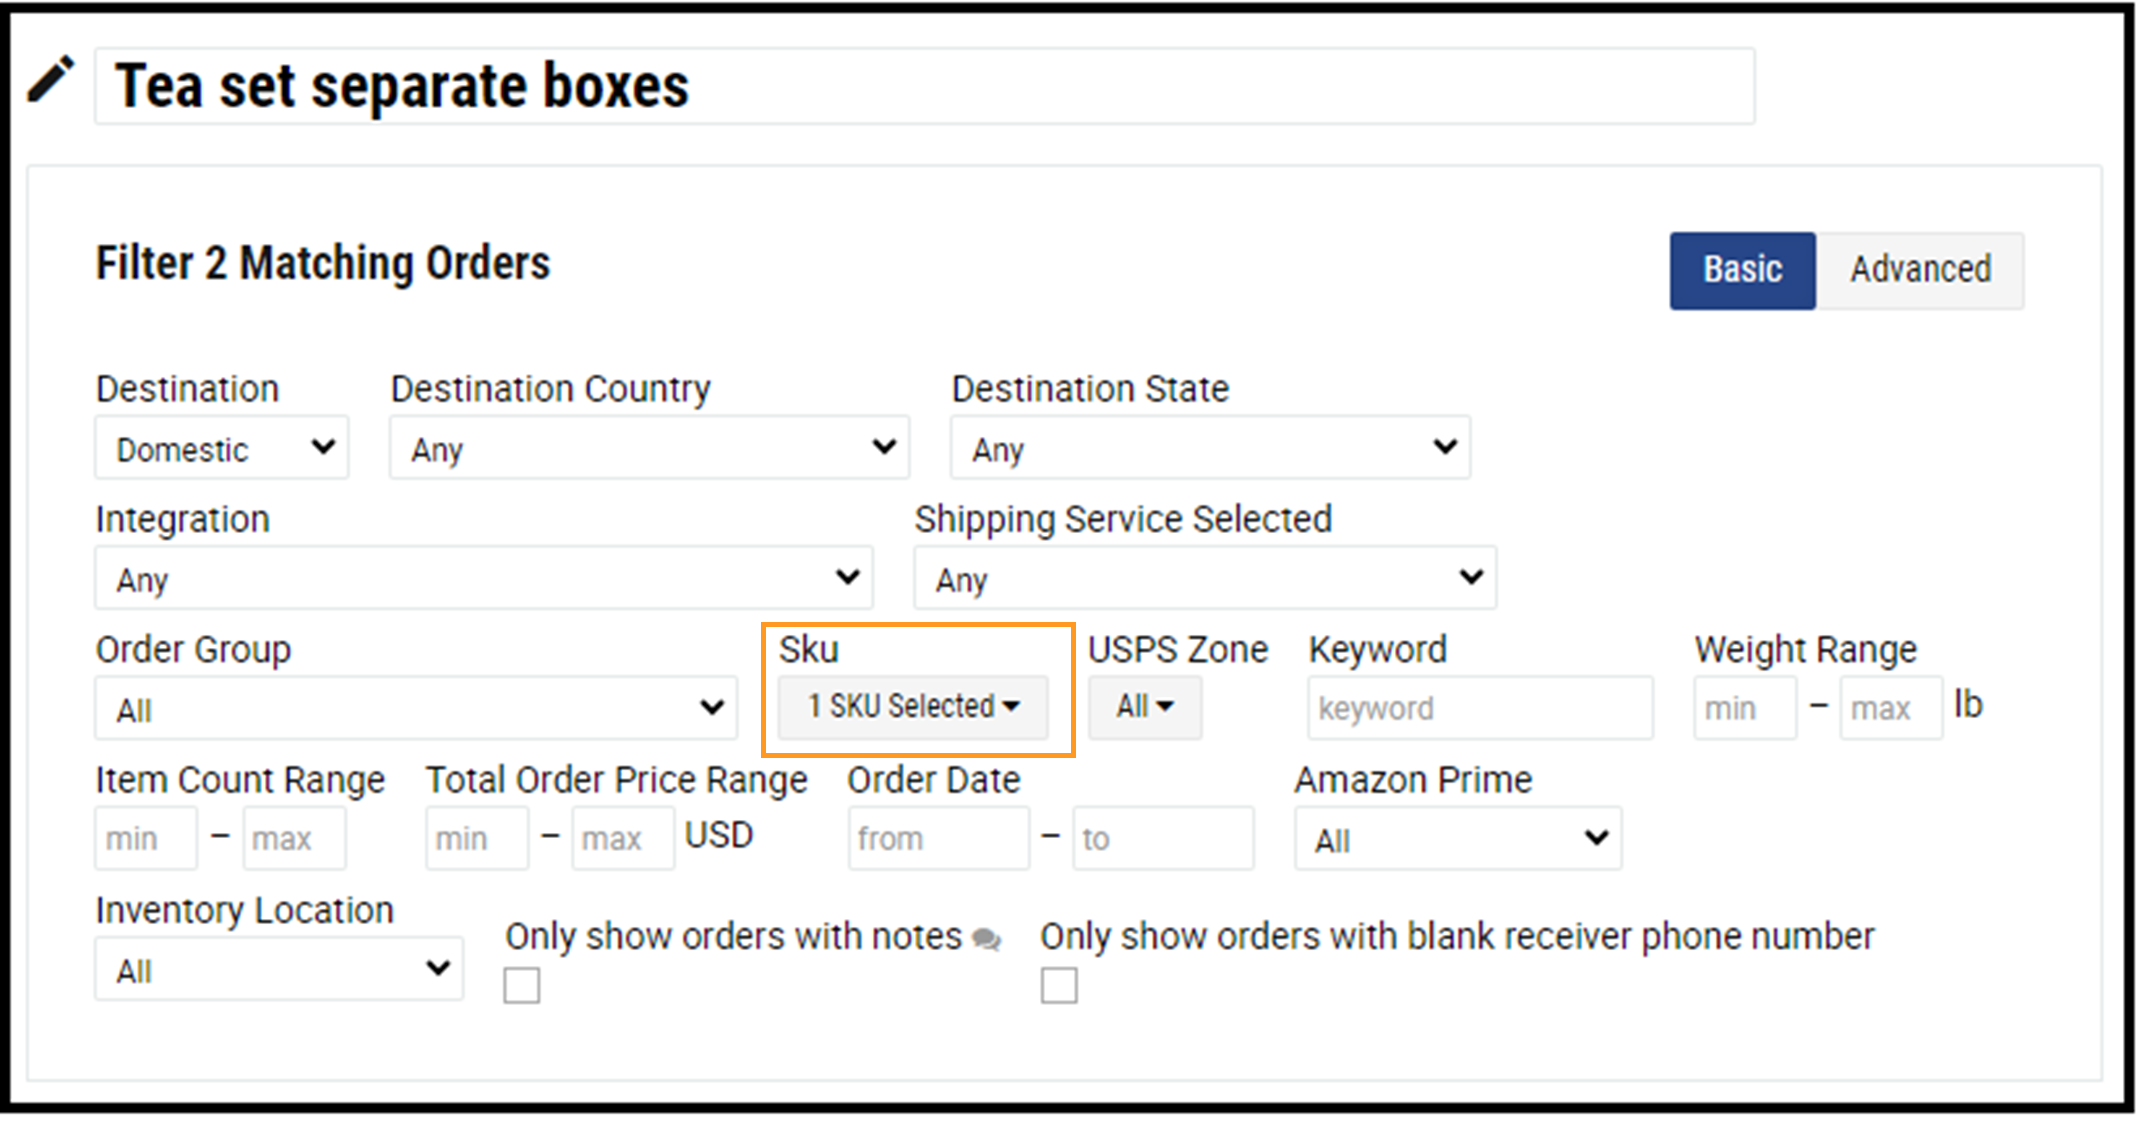
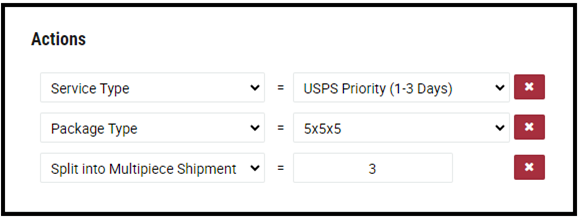
- Shipping Automation: Set the desired number for “SKU,” then choose the actions “Service Type,” “Package Type,” and “Split into Multipiece Shipment.” Enter the desired option for each action. Then, each order for the specified “SKU” will split into multiple shipments using the correct “Service Type” and “Package Type.”
In this example, IF a specific “SKU” is being processed, THEN “USPS Priority” and three “5x5x5” boxes will automatically be selected for the shipment.
Set up Shipping Automation Rules
Ready to set up automation rules for XPS Ship? Our live customer support team is here to help.